What’s in a Warm-Up?

As a teacher, it’s really easy to get warm-up burnout.  As a student, sometimes it can be easy to think rolling on the floor stretching is a warm-up. Both sides can use more of the WHY involved behind the motions. If you know WHY you are warming up and what your GOALS are, they will be easier to meet. And hopefully this blog can help you find new, fun ways to meet those goals.

Bring on the HEAT

The first step of a warm-up is that it should elevate the body temperature to that next degree. If you are wearing a sweater when you start warm-up, you should want to take it off in the first 5-10 minutes of the warm-up. That means you need to BRING IT!

Cardio work is the easiest and sure-fire way to get everyone in class warm, but it doesn’t always have to be cardio. You can use yoga or Pilates, or something along that vain as well AS LONG AS IT IS GETTING THE CHEEKS PINK. When people are worn out from cardio, I hear the breathing get heavier, so I know that they are working, but with non-aerobic work, you won’t necessarily hear the breath change. Instead, you can look at the cheeks around you (on the face silly!) and look for the flush that comes when you are working hard. In yoga or other non-aerobic exercises, it may take more TIME to arrive in the warm-up state. For example, in a ballet class, you may prepare the legs for about 30-45 minutes before you demand them to jump and leap. Be prepared to allow all the time necessary for your warm-up to take people from cold->ready.

DO IT WITH PURPOSE

While you are doing this, use the time to teach other principles of the body. For example, while ballerinas are getting their legs and feet warmed up, they are not thinking “This is warm-up, and I can check out until the jumping happens.” No! Those very first plies and tendus of the workout teach alignment. Going slow helps prepare for setting up body pathways and habits so that when the heat is on, those degages can happen fast and fierce.

For aerial, that might look like a mock pull-up. It’s a little hard to do this progressively with with just pulling down on air, but just going through the motion is valuable as it sets up the body for knowing where it is supposed to be in space.

THE WHY

Why are we so interested that the body temperature goes up? Well, have you ever tried to stretch a cold muscle? If you have, then you intuitively know that it doesn’t feel like it’s going anywhere, but after that heat comes, that muscle is much more prepared to lengthen. When we are cold, the blood is not circulating as much to our extremities and our bodies are more in conservation mode. (If you suffer from cold hands, you may want to really up your game in warm-up until you have warm hands so that you know the blood is in full circulation mode.)

When our blood is circulating more, it is carrying oxygen and nutrients to our muscles to help everything function better, or so I’ve read. I can attest to the feeling, that’s for sure! Warm muscles = happy, ready-to-work muscles.

Care for the Body Parts that will be in High Demand

For our aerial classes, the main thing that we need to prepare is the shoulders because we are sure to use them. There is no way to let them check out when you are in climbing mode. But, it’s also good to give attention to other parts of the body. If you have a specific target area for that workout, be sure to target that especially! Example: If you are going to be doing splits in your double footlocks, well, you need to warm up your splits, etc.

Nerve Care

Nerve Flossing has recently completely changed my universe. I used to suffer from chronically stretching my hamstrings and not getting anywhere. Then, I took a course from Cirque Physio. Apparently, my nerves were totally stuck, because when they got unstuck, my whole world changed. So, of course, I’m passing on the tricks of the trade to my students. In the following warm-up video, we are focusing on nerve flossing for the legs to help improve everyone’s pike position. Then, we focus on the ulnar nerve stretch to check in and see if anyone was tight there. All these exercises came from the courses by Cirque Physio, which I highly recommend. Check out the courses: Click here to visit Cirque Physio.

Peanut Rolling/Self-Massage

Before I was inspired by Cirque Physio to buy some peanuts, I lived on my foam roller. Both are incredible tools for getting muscles more ooey gooey and supple. When you first start rolling, the pressure might hurt, but soon, you’ll toughen up and get addicted!

For me, rolling replaces where I used to stretch. I still swing around my shoulders and dynamically stretch, and sometimes, especially on hot days, I may still add in brief stretches into the warm-up after the cardio portion, but in the colder months, getting on the rollers help to loosen up muscles and fascia in a way that stretching can’t.

In the video, you might see us rolling on our pec minor. This is an exercise that Cirque Physio highly recommends in order for the shoulder blade muscles in the back to function better. The pec minor tends to be tight and since it attaches to the scapula, it can sometimes get into a sibling fight with the muscles that attach to the other side of the scapula. Prevent the fight (and your bad rounded shoulder habits) by telling the pec minor to  back-off.

Rotator Cuff/Shoulder Engagement

The key thing here is that this is not an exhausting workout for your rotator cuff muscles (link is to a previous blog that includes a great video of what your rotator cuff muscles are). If they get worn out, they are not going to able to properly stabilize your shoulders and you actually put yourself MORE at risk for shoulder injury instead of less. But, with just the right amount of activation and engagement, you invite these suckers to fire on and help protect your shoulders. There are a large variety of exercises you can do here, and I will be covering some of my favorites in an upcoming blog. In this video, I have my students do: external rotation with the resistance bands, horizontal shoulder abduction, and then a lovely stretch sequence which helps to open up the shoulders

Everything in Moderation

With every aspect in warm-up, there’s a line where it’s too much. Too much cardio and you won’t have any energy left for a workout. Too much nerve flossing and your limbs will go numb. Too much muscle engagement and you’ll be fatigued even before the workout starts!

However, it’s really important to note that beginner students WILL get pretty worn down by warm-ups at first. They are highly likely to think they are too long. They might think they are doing things that aren’t really necessary (can’t I just climb that fabric now?), but stick with it! In the long run, they will learn something called appreciation. They will see (and notice!) the difference. Time and time again, I’ve watched people CHANGE their minds about warm-up. I known I have a warm-up convert when my students come in before a class or private lesson, etc, and they know exactly what to do to warm-up. They are over on the sideline doing Pilates hundreds, working their butt off like mad. And what completely wipes out a beginner doesn’t even phase them anymore because it’s been in every warm-up for the past 6 months.

There’s No Such Thing as “One Size Fits All” For Warm-Ups

Although aerial teachers do their best to find a “one size fits all” for warm-ups, I always tell my students that there is no perfect warm-up that I can give them. However, I am there to help them discover the perfect warm-up for their own body. I believe in perfect warm-ups for individual bodies, and my hope is that students will come early to class and continue side-line warm-up throughout class until they feel like they are in their peak condition for that day for that class. Yes, I have high expectations. It’s what makes me a good coach. 🙂

And while not every student comes early to class, I do see students going rogue in my warm-ups which makes me really HAPPY because they are learning that they need to take responsibility for their own bodies and listen to the needs of their bodies. I always tell the story of how I got injured and therefore, I need XYZ to make my shoulder move. If I relied on a “generic” warm-up, I wouldn’t have the best workouts because my shoulder needs more care to prevent stiffness (which I’ll get so bad I can’t sleep if I don’t warm up or cool down properly)! So, I have to independently add in stuff before or during class so ensure my own self-care. Everyone will have their thing — certain tight spots, etc, that needs extra attention and it’s important that individual needs are addressed. There’s NEVER enough time to do it all or do it perfectly, but the best thing we can do is educate. The rest is up the students to step up and take responsibility!

This video shows an example of a 30 minute warm-up which is included in a 90 minute class. Enjoy!


New Level System on the Hoop Cards

hoop cards levels

Our hoop/lyra cards have been newly revised to include colored triangles in the color denoting levels for the moves. So, I wanted to take a moment to talk about the level system. You can get totally nerdy with us regarding what goes in what level at our teacher trainings. Check out the schedule here. 

Green = Level 1

Now, just because it’s Level 1 does not mean it’s the easy for everyone. There are things that are considered aerial basics like holding yourself in a bent arm position that some people might take years to work up towards. Everyone starts at such different places of strength that it’s important to allow for a great variety of expectations. To help cater to populations that will take more time to get to inversions, I included a subset of beginning moves that are shaded light green. These are Level 0. The moves in Level 0 should be presented first to all students; these moves may be staple moves for the curriculum of students who come in with more weight, weaker arms, lower body awareness, etc. Other students are going to zip right through Level 0 and will be eager for everything in Level 1.

Here’s an example of a move in Level 0:

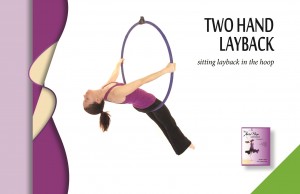
Hoop Cards15


Here are hoop moves in Level 1:


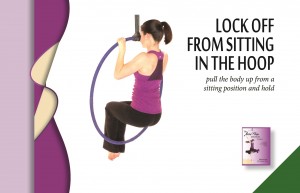
Hoop Cards44Hoop Cards67


Level 1 is designed to prepare students for inversions which make up the bulk of Level 2. Anything that can be done to help build grip strength, pull-up strength, hamstring strength and core strength while not requiring too much of it are the moves to expect in Level 1. As well as any pretty shapes performed from sitting and standing in the hoop.

Blue = Level 2

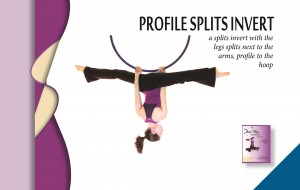
Level 2 is when students start working on inversion strength. They should come in ready for the skill by being decent at the froggie invert under the bar (Level 1), and show that they have sufficiently developed their grip and core strength. By the end of Level 2, students should be experts at inversions. They should be able to invert anywhere, under the hoop, in the hoop, in the ropes on top of the hoop, etc. They should be able to do various shapes in those inversions: ball, pike, straddle, splits, arched arrow, and many more.

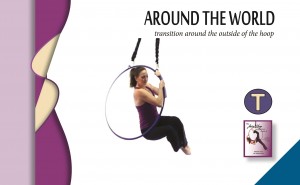
While inversions define Level 2, that is not all that is in Level 2. Once a student starts to master inversions, it demonstrates that they have necessary strength for other moves and transitions for harder moves. One example is a transition around the outside of the bar called “around the world.” In order to do this move, a student has to fully trust their grip strength and have the body awareness to make the journey around the outside of the hoop. Even though this isn’t an inversion, it requires the skill set of inversions: strong grip that you can trust with all your weight, body awareness, and core control. So these are the kinds of moves you’ll see in Level 2.

Here are some examples of hoop moves in Level 2:

Hoop Cards132


Hoop Cards104

Purple = Level 3

Level 3 moves are the moves that have a higher degree of complexity to them. They might require a combination of both strength and flexibility. The danger level might be higher than that of Level 2; they might have little room for error. They might require all the core control of inversions plus the ability to find a point of balance on the lyra bar.

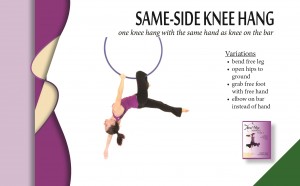
You’ll see a great variety of moves in Level 3, everything from moves that depend on the hook of the knee to moves that depend on the hook of the elbow. You’ll see tons of ways to do splits and other ways to show off flexibility.

Here are some examples of hoop Level 3 moves:

Hoop Cards225Hoop Cards227

Red = Level 4

Level 4 moves are just plain hard. (They are moves that I am still working on myself!) They are the moves require extreme something whether it be extreme strength, extreme flexibility or extreme pain tolerance. Moves such as lion rolls require a very high level of shoulder flexibility and body awareness and control to execute. That’s a move I actually am finding easy these days, but I don’t know a lot of people who can do them. That’s how I knew to put them in Level 4.

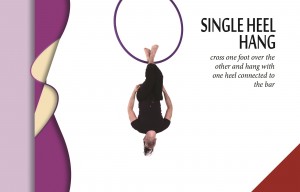
If it’s hard to find an aerialist who can do a particular move, it’s a Level 4 move (when looking at the average aerial student population). You’ll find toe hangs, heel hangs, y-scale, and more all here.

Here are some examples of Level 4 hoop moves:

Hoop Cards282Hoop Cards287


Rebekah Leach loves talking all about curriculum at teacher trainings. Check out her teaching schedule at www.borntoflyaerial.com.

Find out more about the lyra/hoop cards here. 


Balancing Teaching and Self Part II: Your Own Training Time

If you are an aerial teacher, there comes a point where your priorities shift from your own development to that of developing other people. But, most of us always have a higher place we want to be when it comes to our bodies. Just because you are a teacher does not mean the work of your own body is done. This is not ballet where the teacher is assumed retired and done dancing now that they teach. A circus life never ends. Never retires. You will forever have a higher vision of where your body could take you. It’s why you started this journey in the first place, right?

As for fitting in your own training time, it must be done! And it can be HARD. In fact, I am writing this to preach to myself because I am currently skipping my own training time to write this article. I was simply demotivated to work out, and I felt like writing instead. I am hoping to uncover some hidden secrets as I write out my thoughts. If nothing else, I’ll feel like a total hypocrite if I don’t take my own advice. So telling you to work out will make me work out.  haha!

First, decide which camp you are in: Do you need a separate day for your own training apart from your teaching days OR do you need to stay late and bust out a workout after your teaching hours? If you want to optimize the time in your life, it makes sense to workout on the days that you are already at the studio, plus warm from teaching class (or at least, quazi-warm). If you feel too tired or demotivated after teaching to do your own workouts, either push through anyway (you’ll get that second wind!) or come back another day.

For myself, I find that my need for days away from the studio supersedes my need for days devoted to my own training, so I have decided that I will self-train on my teaching days. That means I have 4 days of the week that I need to make it happen.

Now, you need a plan. If you don’t have a plan, guess what? You do have one — You have planned to fail. Pro-wrestlers and body-builders have a plan. They focus on a different muscle group each day. Personally, I like to set goals for aerial skills I’d like to achieve. I work on a different skill each day which ends up working a different part of my body each day. Here is a sample of my plan:

Mondays: I start with the weakest part of my body–my hamstrings. My goal is to be able to get a single knee hang on my left side. I can fake one, but I can’t do a real one with solid technique right now. I would also love to be able to do heel hangs on the trapeze or lyra. This takes a ton of hamstring strength. Even if I just do a few hamstring pulls on a resistance band, I feel like I’ve met my Monday training goal. Sometimes having a way to just do the minimum and go home is a way to make it work when you don’t feel like it.

Tuesdays: This is a day I focus on my grip. I already have hand-over-hand climbs, but I don’t yet have enough strength to simply hang on one arm with strong technique. Again, I can fake it, but it’s not safe. I want to be able to stay engaged in all the right ways while only holding with one hand. So on Tuesdays, I work on rope, doing a lot of momentum exercises and drills for grip strength.

Wednesdays: This is a day I like to focus on flexibility. After the birth of my second child two years ago, I completely lost my splits. It takes so much soak time to get more flexible; since I have the biggest time-block on Wednesdays, this is the day that I stretch. I use aerial yoga to incorporate the core and other strength exercises into my flexibility, so it’s not just passive stretching. It’s very active stretching for functional flexibility.

Thursdays:  Thursdays is the day that I teach some really fun choreography classes, so this is the day that my creative juices tend to be flowing a little bit more. I use this day to focus on creativity. Right now, I am working on a trapeze piece. It’s not my home-apparatus and so I’m not as comfortable on it, but it’s fun nevertheless. I have put some hard moves in the piece that I would like to work on (can anyone say elbow circles?!) and I’ve been having a fun time putting this together. If I don’t get enough time on Thursdays to work on my piece, then I will occasionally come in over the weekend so that I can keep up my work on the piece. Having a show to work towards always helps. That’s why I have shows at my studio every 3 months. It’s very motivating for me to continuously work on new work. 🙂

All the other days: One of the keys to flexibility is self-massage. This is one of the things I very much enjoy on my days off from aerial. I love rolling on foam rollers, sitting on heating pads while in a relaxing stretch, stretching out my hamstrings with lacrosse balls, etc. This kind of time is easy for me to get done. That’s why I’ve got my splits back on at least one side. Now if only my right leg would cooperate and my right splits would come back…

Keep in mind that sometimes you can accomplish your daily goals in bits & pieces. Maybe you don’t have a full hour to devote to your training. Maybe it’s only 15 minutes between classes. That is plenty of time to burn out your hamstrings in a quick knee hang drill. Or whatever the case may be for your body and the things you are working on. Your muscle can get worked in a matter of seconds, so take advantage of any time you have and push through.

“You will get where you are headed unless you do something different.” – No idea who said this quote, but I’ve always liked it. Where are you headed? Where are your habits taking you? Is it to the place you want your body to be? If not, change what you are doing. Make it so that what you are doing leads you to where you want to be. You will magically wake up one day more flexible and stronger…if the preceding 100 days were spent working for it.