For the first time in 8 years, I have a rig in my house. We just moved back to Colorado, and I picked out our house based on the fact that it had a living room with 17-foot-tall ceilings. As soon as I saw that, I was sold.
Even though I knew I was destined to rig in my house (how can you not with 17-foot-tall ceilings?!), I didn’t quite know how I was going to accomplish this goal. I have three portable rigs, but they are all like swing sets and require an exorbitant amount of space in their footprint, so I couldn’t exactly put them up even if I was desperate enough to want to try.
I have several friends who have rigs points mounted in their houses that look seamless and that’s what I originally wanted. I was so that 5 year old all over again “But this is what Sally has in HER house.” We had a general contractor around doing some work on our house (for other things), so he was the first person I asked to see if he could help me do it. He said that he would do it if I found a structural engineer to create plans so that way he could guarantee that it would hold the required loads. Well…as you know, aerial rigging loads are high as they need to be to be safe, and that’s not an easy thing to do with what’s in your house. Bottom line: It’s typically not safe to rig into the structure of your house. It’s not designed to handle those loads unless built from the ground up to do that or reinforced with the stamp of an engineer to handle required loading.
So I knew I had to find another option….
I have been working with top-notch aerial riggers in getting my commercial space ready for use, and they suggested trussing. At first I was hesitant because at one point, I remember reading that the WLL (working load limits) on truss are low. And, sure enough, they can’t beat steel. But, turns out, they are going to be perfectly suited for all of my aerial needs. I know my loads, what I generate and what my friends and students will be doing. I’ve paired this knowledge with the span of each truss and what the WLL of each truss is, and it’s going to work!
To do it right, you will need to build a structure within your structure.
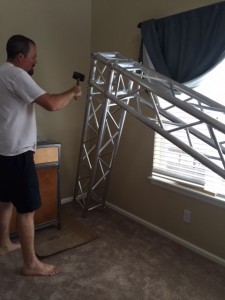
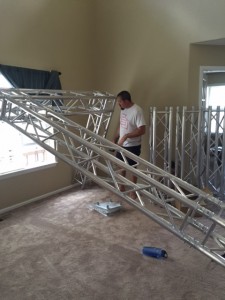
PLUS, the best part was working with Vertical Art Dance, which is who I ultimately ended up buying my truss system with. I had the best experience buying with them. They took time to get all the measurements of my living room and helped me design a T-shape that frames my window on one wall, and hides behind the buffet table on the other side of the room.
I really wanted adjustable points that were going to fit my budget and Vertical Art Dance even taught me new methods of rigging! For the rig in my house, I’m using a hollow block on my rope that adjusts easily and the rigging didn’t cost a fortune. (More blogs later about rigging.)
Now the truss on the other hand… I’ll admit it’s not cheap. But it’s an investment that is going to be worth it for my aerial-addicted self!!! I’ve already used it to prepare for several performances.
My truss arrived just a few short weeks ago. My husband got right in there and started putting up the truss. We put up the first layer of the cake and then had to wait until we had a larger crew to lift up the truss for the next couple layers. Having the first layer of the truss in the living room for a day was fun. I couldn’t keep my daughter off it, for one. And secondly, I was finding new ways to incorporate a horizontal fixed bar into my aerial yoga practice. It was great fun.
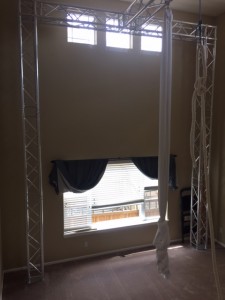
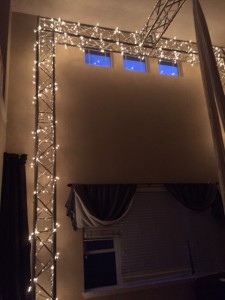
We had a team of four strong men to lift the truss all at once. In hindsight, it would have been much smarted to take the advice of Vertical Art Dance, and put up the truss at more of a rotation in the room, allowing for more of the tilting to occur, and then rotate into place when the truss was up. But we went for the brute force way. It got done.
If you do have a home rig, it’ll take your practice to the next level, but I have some words of advice to consider regarding setting up at home:
Rule #1: Home rigs = Not for beginners.
I know that you are really wanting to practice your newly learned aerial moves at home, but that’s not the place for a beginner to practice. If you are looking for ways to up your game at home, there are plenty of ways! You’d be surprised how much you can do to support your aerial that’s not directly aerial. If you have access to a pull-up bar, you should check out our latest series: NONE to ONE Pull-Up Program.
Rule #2: Never practice alone.
It can be tempting to practice on our own if the rig is right there in the middle of the room and you are in the mood to workout. If you can’t fight the temptation, then the aerial community would recommend that you don’t get a rig in your house.
Rule #3: Never attempt things from the internet that you are unfamiliar with.
We have over 550 moves in our video library, but hopefully you’ve noticed, we don’t advertise our site as “Learn Aerial Online.” No one should be advertising that to the aerial community. It’s not safe. You should always learn new things from someone who knows the move. Then they can tell you what wrong thing will happen if you hook this way instead of that way, etc. Then, use a resource like AerialDancing.com’s crazy library to review moves, or find new variations to moves that you are already familiar with.
Rule #4: Don’t do drops without a trained aerialist spotting your wrap.
The second rule–about not practicing along–is in case something happens, you have someone who can call 911 or somehow help you down. THIS rule is to prevent something from going wrong in the first place. Only another trained eye can spot what’s right/wrong in a wrap, so get with them when you are going over drops. Heck, I’ve wrapped wrong for drops I’ve done a 1,000 times. It happens. I was in an open gym, but no one was watching me, and I missed half a wrap. Thankfully the fabric caught me 10 feet later, but it wasn’t comfortable. It could have been prevented had someone been eye-spotting my wraps.
Rule #5: Warning -everyone will want a piece of that.
You have an indoor rig in your house. You’re probably the only house in your entire neighborhood that has such awesomeness. Have a good time with it. Just please don’t start giving private lessons to every friend who wants to learn unless you are ready to go into teaching. In that case, get properly trained and then use your friend-teaching hours as part of your training process under guidance of a mentor. Check out a program like Born to Fly Teacher Training Programs & Support for more.
If you have kids, those kids will bring around other kids who will all want to go on your rig. Set boundaries about what you will allow and won’t allow. The most important thing is that you are looking out for everyone’s safety. Kids are quick to climb fast and say that they are being careful, but they don’t always think about how they are going to come down, and they love jumping down. Perhaps you set a limit on how high kids can climb, if you let anyone else on your equipment at all. (And remember that adults are just big kids.) You are liable, after all.
Hope this has helped you think about your home-rigging situation. I’ve survived with my pull-up bar and resistance bands for the past 8 years, so if that’s all you can afford right now, don’t be discouraged! It took me 10 years to get to the point of not only being able to afford this rig system, but also how to use it to its full potential and most importantly, safely.
FINAL RULE: Don’t compromise safety for your fun.
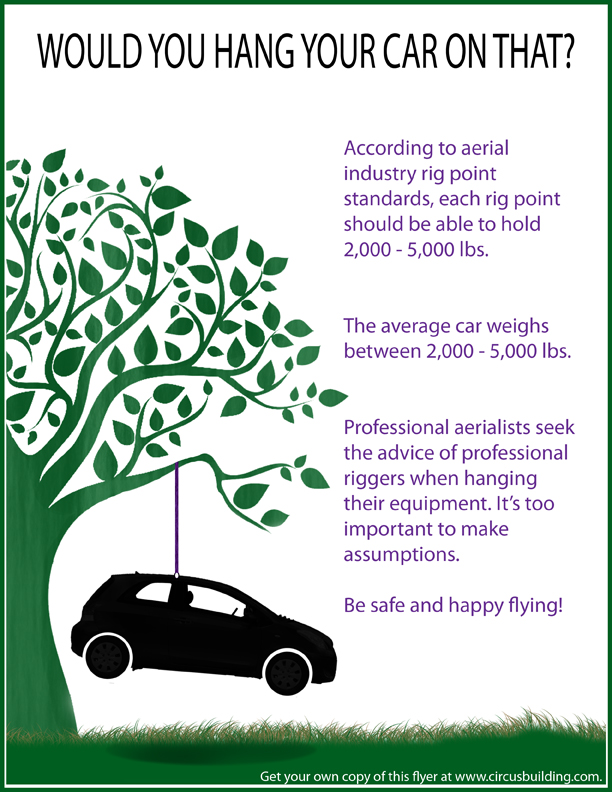
We didn’t talk about loads in this article, because that’s assumed from the get-go. But, not everyone understands that. In short, I will leave you with this great flyer that many in the aerial community will recognize. It’s great to put up in your local studio to remind people that to safely suspend a person, you’d need to be able to suspend about the weight of a car.
You can download this poster from the Born to Fly Resource page or from www.CircusBuilding.com.
 For more information on truss systems for aerial rigging, please visit VerticalArtDance.com.
 So, I’d thought I’d give you some tools to help along the way! One big project that we have been working on here at AerialDancing.com is choreography cards. Our goals is to create cards for all the major aerial categories that we specialize in, (i.e. hoop/lyra, rope, silks, trapeze, aerial yoga, and sling).
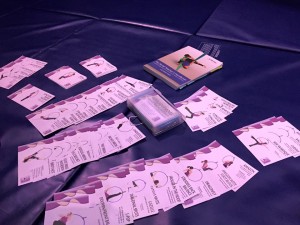 We already have two sets of choreography cards available – a set for trapeze and a set for hoop. Whether you make your own cards or purchase some here for the convenience (and new ideas!), you can use the skill pictures to spark the creative juice flow. Here are some card games to get your started: (Note: Most are meant to played in groups of 2 or 3 people.)
